Is That True 4K?

While native 4K resolution is commonplace in flat panel displays, there are still many resolution options when choosing a projector, including WXGA (1366×768), WUXGA (1920×1200), 1080p (1920×1080), and various options to achieve 4K (3840×2160). As an alternative to the high cost of using native 4K chipsets, many projector manufacturers offer a form of “pixel shifting” to achieve 4K resolution on the screen. To add to the confusion, manufacturers have their own terms to describe this feature, including 4K Enhancement, 4K-Ready, E-Shift, XPR, etc., depending on the brand you are working with.

Simply put, pixel shifting uses a WUXGA or 1080p chip and, with advanced processing, shifts each pixel either diagonally or horizontally and vertically at rapid speeds, creating multiple sub-frames that are combined to produce a higher resolution image on screen. The process happens so fast that our eyes are not able to detect the individual frames, resulting in an image that rivals native 4K at a significantly reduced cost. Additionally, it is important to note that there is more than one method of pixel shifting. For this article, I will refer to the terms used by Epson to describe them.

pixel shift illustration

4K Enhancement was introduced first and has now been on the market for several years. Projectors that feature 4K Enhancement can receive 4K (3840×2160) signals and project ultra high definition (UHD) images by shifting each pixel diagonally by 0.5 pixels, effectively doubling the on-screen resolution to approximately 4.15 million pixels. This allows support for a wider range of available input resolutions in a given system and displays image quality higher than HD when showing 4K content.

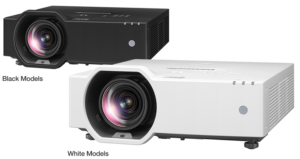
EB-PQ2008B Epson 4K projectorMore recently, a new type of pixel shifting has been introduced, which Epson is calling 4K Crystal Motion. In this case, the pixel shifting happens both horizontally and vertically, effectively quadrupling the resolution of the 1080p chips to show 4K (3840×2160) with 8.3 million pixels on the screen. Here, a very critical eye would be required to discern the difference between this image and one coming from native 4K chipsets, while projectors using this technology are also significantly less expensive than those offering native 4K.

Lastly, there is native 4K, where the projector uses advanced imaging chips with no pixels being shared, providing the utmost accurate presentation of the source signal and resulting in the highest possible quality, but at an additional expense compared to pixel shifting. So which one should you consider? This will depend on a variety of factors, including but not limited to image size, viewing distance, source content, the resolution of the source material, and budget.

With larger image sizes, the potential for a user to see the individual pixels on screen increases; however, this is reduced when viewing distance increases. Additionally, the type of content being displayed matters. Naturally, a PowerPoint presentation would not require the same level of detail as spreadsheets or engineering drawings, and it’s possible the client may not even have 4K resolution content in the first place.

Like any other project, the key to success is understanding the needs and vision of the client and then providing the best solution given their budget. Look closely at specifications to be sure you are getting the right projector for the intended purpose. The bottom line is projectors that use pixel shifting will allow you to display 4K content with an image quality rivaling native 4K projectors at a significantly reduced cost and will meet the needs of many commercial video projects.

Have more questions? Contact Exertis Almo for a consultation.
Check out one of Brian’s other blogs, “5 Keys to Selecting a New Projector“.

Brian Rhatigan headshot
About the Author

Brian Rhatigan | CTS, DSCE

Director of Business Development

Supported Manufacturers: Epson, Huddly, Kramer, Jabra

Decoding LG’s Commercial Display Lineup: Made Easy

When it comes to selecting the right commercial display, LG has a vast range of models that can feel overwhelming at first glance. With constant innovation and upgrades, navigating this lineup can seem complex. But don’t worry—once you crack the code behind LG’s model naming conventions, choosing the perfect display becomes a breeze. Let’s break it down so you can decode LG’s commercial displays like a seasoned pro!

Below, you’ll find practical tips to help you navigate LG’s commercial display lineup. Whether you’re specifying displays for a project, finding a model that fits your budget, or overcoming inventory challenges by identifying suitable alternatives, these tips will make the process simpler. While the details may change from time to time, these rules of thumb have proven to be consistently helpful, and I hope they are for you too!

Note: These tips apply to LG’s standard commercial display lineup. Other product categories, like Commercial Lite (TV), touchscreen displays, and DvLED screens, have their own naming conventions. We’ll cover those another time!

Step One: Size It Up

The first two digits in any LG commercial display model indicate the display size (in inches). For example:

  • 86UH5E: The “86” tells you it’s an 86-inch display.
  • 49ULJ5: The “49” signals a 49-inch display.

Pretty simple, right? Once you spot those first two numbers, you know the screen size.

Step Two: Understand the Series

The next two letters in the model number tell you about the display’s performance level:

  • UH: These are high-end models, offering premium features like higher brightness levels (500–700 nits) and versatile orientation options (landscape and portrait modes).
  • UM: Mid-tier models. These may have slightly lower brightness or fewer orientation options but still deliver solid performance.
  • UL: These are entry-level models—Less bells and whistles but still dependable and more affordable.

Step Three: Brightness Levels

The first number after the series code indicates brightness—a crucial factor based on the display’s environment:

  • 5: 500 nits, ideal for standard indoor settings.
  • 7: 700 nits, great for areas with more ambient light, like storefronts.
  • 3: 300 nits, suitable for controlled lighting environments.

Step Four: Model Variations

Next, you’ll often see one or two additional letters. These represent minor differences between models, like the version of webOS the display uses or slight dimensional variations. While these may seem small, they can be key depending on your specific application.

example specs of display modelsFor example, you can quickly tell that the 75UL has fewer features than the 75UH just by the “UL” in the model number. Meanwhile, comparing the 75UH5J-M to the 75UH5E-B, you’ll notice the differences are minor. However, changes like the webOS version could make or break your project, so always double-check the specs before finalizing your choice!

Decoder Key:

  • First two digits: Display size in inches.
  • Next two letters: Performance tier (UH = high-end, UM = mid-tier, UL = Less features/ entry-level).
  • First number after the letters: Brightness level (e.g., 5 = 500 nits).
  • Last few letters: Minor model variations (e.g., webOS version or specific features).

Now that you’ve got the basics down, decoding LG’s commercial display models is a piece of cake! Whether you’re setting up a high-end digital signage solution or finding a reliable mid-range option, you can confidently choose the right display for your needs.

Looking to crack the code on more complex solutions? Our Business Development Team—featuring brand specialists, technical experts, and category pros—is here to guide you through advanced inquiries. Whether you need support with displays or assistance specifying mounts, audio, control systems, or any essential components to bring your projects together, Exertis Almo has your back!

Want to know more? Check out Tiff’s other blog “Amping Up Government Operations: Rocking out with cutting-edge AV gear
Tiff Jones-Morton headshot-frame
About the Author

Tiff Jones-Morton | DSCE

BDM – Brand Specialist

Supported Manufacturers: LG Business Solutions (NE, SE, MW)

Contact Exertis Almo for product info, inventory availability, or to start a quote.

Why Is Quality Important When Selecting Audio?

I was pondering this topic recently when I met a friend for lunch at one of my favorite eatery places. They recently moved to a new location and ever since moving, it’s been difficult to really enjoy eating at the place. My friend and I were discussing how incredibly loud the place gets, to the point that it’s difficult to really have a conversation with each other.  As a result, I often just pick up the food and bring it home.  This situation really made me wonder what was missing in the audio design when they moved to this new location. I decided to do some research by talking to our Exertis Almo Audio Experts to gain some insight and, hopefully, help you avoid this common mistake.

When choosing the audio technology for a project, every installation is a reflection of your brand and reputation. Customers expect their audio systems to perform without trouble, and it’s essential to select quality solutions that deliver exceptional functionality and reliability. Fortunately, there are many high-quality audio options with cost-conscious price tags, so you won’t have to compromise on excellence.

Additionally, quality is often reflected in the ease of installation. Specifically in meeting rooms, huddle spaces, and classrooms, audio technology should be simple to use and strive to avoid any frustration for the end-user. This simplicity can help ensure that the technology is used effectively, avoiding the common pitfall of equipment going unused due to user confusion.

Here are a few key considerations when selecting quality audio technology.

Assess your environment.

Before installing audio equipment, it’s important to evaluate the space itself, as there are many factors that affect audio quality. It’s essential to consider the acoustics of an environment, as a particular space might require a few changes to adjust the echo and create a more comfortable listening experience once the audio equipment is installed.

In fact, it’s common to run into acoustical issues in multi-use spaces, as they’re designed with several functions in mind. For example, a school might utilize a single space for their gym and auditorium, which can cause acoustical design to be overlooked.  In essence, you’ll want to assess an environment before investing in any audio technology, as acoustical treatment is an essential step in providing a high-quality audio experience.

Consider service and warranty.

Along with functionality and reliability, quality often correlates with the level and service and warranty provided by manufacturers. Although you aim to avoid any issues with a particular product, you should ensure that support is readily available if problems arise with a manufacturer’s technology. This aspect of product selection is frequently overlooked, but having a product warranty and readily available support can help save time and protect your reputation with your customers.

See the products in action.

When you get to experience the way in which products function across various environments, you can understand the practical applications of those solutions. There are a variety of educational resources available to strengthen your understanding of a product, and you can later apply that knowledge in the field to truly understand how the technology functions in a particular space.

Don’t overlook the audio.

If you’re looking to achieve high-quality audio in a space, it’s essential to ensure that the audio is not overlooked in the planning and design process. Oftentimes, the visual aspects receive far more attention, like displays and protection technology. In order to design a well-rounded, comfortable space for users, the audio and visual components must both be at the top of the list.

The bottom line is that quality audio is paramount for successful, comfortable communication.

For me, the main takeaway was simply that it’s crucial to assess the environment, because, in my scenario, the restaurant would have identified ways to absorb the noise. Would that have fixed it completely?  It would make it more comfortable for their patrons to chat, and they’d potentially spend more time and money.  It might’ve cost a few more dollars, which would have paid off in the long run.

You always have available resources to assist with all of your audio and video needs at Exertis Almo.  Please feel free to contact me or your Exertis Almo team.

Check out Angie’s previous blog, “Is TAA Compliance Required for Audio?“.
Angie Greene
About the Author

Angie Greene | DSCE

Business Development Manager

Supported Manufacturers: Panasonic Connect

LCD vs DVLED: Choose the Right Technology for the Right Application

In a world where Direct View LED (DVLED) is becoming the dominant technology for new video wall installations, does the multi-display LCD video wall still have a place?

Recently, I encountered several instances where clients were interested in DVLED walls but found that a multi-display LCD wall was a better fit for their application. One such case involved a sports bar, and I want to detail why we chose LCD over DVLED in this instance.

LCD display example
direct view led example
AIO dvLED

The sports bar client was initially interested in a 1.88mm pixel pitch 163” all-in-one DVLED display which can be a great choice to get a large, bright, full HD (1920 x 1080) display in a relatively compact and cost-effective form. video wall All-in-one DVLED displays are a great option as they do not require external LED controllers/sender units to operate since all the required components are built into the unit, so it functions like a standard monitor, and there are typically several predefined sizes to work in various environments.  The other option for DVLED is a custom video wall solution. Custom DVLED walls are a good option when you have an application requiring a specific size display, atypical aspect ratio, or need specific resolutions or brightness levels.  Custom DVLED allows the user the broadest choice in selecting products to meet the needs of their individual application, but generally requires a more complex installation using external LED controllers/sender units.

low resolution imageIn this example, after talking with the client, it was determined that the better way to achieve their goals was to use LCD technology due to one primary factor, resolution.  The client stated that they wanted to have multiple unique images on the display simultaneously, up to 9 different sporting events or advertisements on the wall at any given time. While it is possible to show the required number of images on the DVLED display using external video processing, the resolution of each image would end up being very low using the DVLED display discussed.

In the sports bar example, if we created 9 images on the 163” 1920 x 1080 resolution display, each image would be approximately 54.3” diagonal and have a resolution of 640 x 360 which is not ideal (see simulated images below).  This leaves us two options to explore to get a higher resolution individual image on the display wall, either go with a custom DVLED solution with a finer pixel pitch or change to an LCD display array.

LCD lo resolution
LCD hi resolution

If we went the custom DVLED path, we would need to use a sub 1mm pixel pitch to see a significant increase in resolution, as well as incorporate external video processing to create the multiple windows desired.  This would end up being cost prohibitive for the project.  If we change to a multi-display 55” LCD option, we can create a 3-display high by 3-display wide array of 9 total displays with the entire array being 165” 5760 x 3240 resolution, and each of the nine 55” images will have a 1920 x 1080 resolution which would be ideal.  Additionally, most commercial LCD displays designed for use in a video wall array application have a feature to allow you to create an image on the array of displays (or a subset of the array) that will span multiple monitors without the need for any external video processing equipment.  By changing to the LCD array, we were able to provide the client with not only the ability to show nine full HD resolution images on the array, but also being able to show one large image spanning the entire array or one enlarged image spanning four of the displays on the array and individual full HD images on the remaining five displays, and for a similar price point to the 163” all-in-one DVLED display.

9 panels
9 panels 1 image
9 panels mixed configuration

I wanted to highlight this use case to convey that the latest trends in technology aren’t always the best fit for a given application.  While DVLED has many advantages over LCD, such as, no bezel spacing between panels, greater ability to customize the physical layout, and higher available brightness levels, the end user needs should be evaluated for each project before the technology is considered for the application.  In this instance, the most important needs for the client were to have multiple high-resolution images on the display simultaneously and have the technology fit within the physical parameters of the chosen wall, so the LCD array was a better choice.

If you are considering a video wall for your next project, discuss these key factors with your design or integration partner to make sure you get the most appropriate technology for the application:

Desired content layout and usage

  • Do you just want one large image from a single source, or would you like to display multiple sources/images at the same time?
  • What type of content will you be showing primarily? (i.e., text/documents, video, construction plans, custom signage, etc.)
  • Will the display need to be running 24/7, or does this application only require periodic use and the ability to fully power down the system is desired?

Physical constraints of the space

  • Does the display need to fit within a certain area on a wall?
  • Are there any room constraints that need to be overcome? (i.e., poor light control in the desired location, power restrictions at the desired location, construction limitations at the desired location, cabling limitations, etc.)
  • Is the ceiling height sufficient to get the size of display needed for the application, or is a smaller primary display with additional repeater monitors within the room required to accommodate the audience?

Other considerations

  • How flexible is the technology budget for the room, does the display absolutely need to fit within a certain price range, or will the budget be determined based on the most appropriate technology for the space?
  • Are there any special requirements for the display? (i.e., We don’t want to see any bezel gaps on the display regardless of cost)

Transforming Your Business with AV Outsourcing. See how teaming with Exertis Almo can give your business an edge by expanding reach and establishing recurring revenue. Learn more ⟫

Dominic Pizza - Headshot

About the Author

Dominic Pizza | CTS-D

ECC – Design Engineer

The AV MBA | You Can’t Always Get What You Want

options to considerAs I write this article, my truck is in the shop having new tires put on. Buying tires is one of my least favorite purchases of all time!!! Yet every few years I go through the same process. Gather my tire size information, check some tire websites, identify my needs in terms of performance (I live in Buffalo, NY, so a tire that performs well in the snow is a must!!!), establish my budget, read some reviews, select my top picks, shop prices, book the appointment.

This time around, I’m coming off a set of tires that performed very poorly in terms of mileage. They only lasted 24,000 miles and I rotated them every 5,000 miles. That is TERRIBLE!!! Additionally, they had a highway tread, which was good for gas mileage, but didn’t give me the traction I needed in the deep Buffalo snow. Finally, my service to this point has been done at the dealer. However, my free service package has timed out, and the dealer is farther away and more expensive than most of my local shops, so I am no longer motivated to use them.

Based on those factors, I shopped around for an All-Terrain tire at a discounted price from what my dealership was offering that got great reviews and picked the lowest priced local auto shop. While the tire I chose is more expensive than my original set, I will get better on-road performance and a longer tread life. This brings my total cost of ownership below the level of my current set of tires. I can live with that.assess the tradeoffs

Weighing the Options for Your Next AV Project

When working on audio-video (AV) projects, there are several tradeoffs to consider ensuring the project meets its objectives while staying within budget and time constraints. Here are some key tradeoffs:

Cost vs. Quality

    • High-Quality Equipment: Investing in top-tier equipment can provide superior audio and video quality, but it comes at a higher cost.
    • Budget-Friendly Options: Opting for more affordable equipment can save money but might compromise on performance and longevity.

Complexity vs. Usability

    • Advanced Features: Incorporating advanced features and automation can enhance functionality but may require more complex setup and user training.
    • Simplicity: A simpler system is easier to use and maintain but might lack some advanced capabilities.

Flexibility vs. Specificity

    • Flexible Systems: Designing a system that can adapt to various uses and future upgrades can be beneficial but might be more expensive and complex.
    • Specific Systems: Tailoring the system to specific needs can be more cost-effective and straightforward but may limit future adaptability.

Aesthetics vs. Functionality

    • Aesthetic Design: Prioritizing the visual appeal of the setup can enhance the user experience but might limit equipment choices and placement.
    • Functional Design: Focusing on functionality ensures optimal performance but might result in a less visually appealing setup.

Scalability vs. Initial Investment

    • Scalable Solutions: Investing in scalable solutions allows for future expansion but requires a higher initial investment.
    • Fixed Solutions: Implementing a fixed solution can be more affordable initially but may not accommodate future growth.

Integration vs. Independence

    • Integrated Systems: Integrating AV systems with other building systems (like lighting and HVAC) can provide seamless control but increases complexity and cost.
    • Independent Systems: Keeping systems independent simplifies installation and maintenance but might reduce overall efficiency and user experience.

Maintenance vs. Initial Cost

    • High-Quality, Low-Maintenance Equipment: Investing in high-quality equipment can reduce long-term maintenance costs but requires a higher initial investment.
    • Lower-Cost, Higher-Maintenance Equipment: Choosing cheaper equipment can save on initial costs but may lead to higher maintenance expenses over time.

balancing tradeoffsBalancing these tradeoffs requires careful planning and consideration of the project’s specific needs and constraints. Conducting a feasibility study and involving all stakeholders in the planning process can help identify the best approach 1 2. This way, you will be on the road to success and avoid getting stuck in the mud!!!

Is there a specific aspect of AV projects you’re focusing on or a particular challenge you’re facing? Get in touch to discuss.

Want more business development advice? Check out Tom’s earlier blog, “The AV MBA: Put Your Keys on the Dash!“.
Tom Keefe BDM

About the Author

Tom Keefe | CTS, DMC-D-4K, DSCE

Category Manager – dvLED

Supported Category: Direct View LED

AV Design Engineering vs. Project Engineering

Project vs. Design Engineering

When I first joined the AV industry almost 20 years ago, I worked as a project manager for a small integrator in Baltimore. My understanding of AV engineering at that time could be summarized as “there are real engineers (those that worked for my company) and then there are consultants and designers”. The rationale for this skewed perspective was simple: consultants and designers handed us (the integrator) a design full of holes and assumptions, and it was our job to fix those “mistakes” and turn the project into a real-life system that a real-life person could use and benefit from.

av integratorOf course, this naïve and incorrect view was the result of being on only one side of the fence. In the following years, I have been lucky enough to serve in several different roles throughout the industry, from design engineer at a major university, to project engineer, to consultant. Each of these roles has presented different sets of challenges, but more importantly, they have allowed me to see the industry from both sides of the fence, and how each of these roles complement each other to produce satisfactory results for clients and end users.

So what are the actual differences between the “project” engineering and “design” engineering roles? From a distance, these can appear to be two descriptions of the same task, but as we’ll see the differences are significant, beneficial, and necessary for the success of larger-scale projects.

Definitions

For the purposes of this post, we’ll divide the engineering roles into two categories: Project Engineering and Design Engineering. Project Engineering is typically undertaken by one or multiple engineers working for or on behalf of an AV Integrator to produce construction drawings to be used by installers working for that integrator. Design Engineering, on the other hand, is typically undertaken by an independent consultant or pre-sales engineer, creating conceptual drawings which will typically be used by an integrator to create construction drawings.

Goals

As previously stated, an AV Project Engineer is producing construction-level drawings which will actually be used by technicians to install a system. This entails a much higher level of detail and specificity than expected in design-level drawings. As products are being purchased and labor hours are being spent based on the information contained in the drawing package, money is on the line. Every connector, cable, adaptor, and piece of mounting hardware must be accounted for and documented. Cable pull sheets can be generated from these drawings, so cables must be identified and labeled in an understandable scheme. The financial (and technical) success of the installation and project are often reliant upon the accuracy of these drawings. For example, if a Project Engineer overlooks the need for HDMI extension for a long cable run, an extender set may need to be ordered from the field, which can lead to project delays and significant cost impacts.

By contrast, the AV Design Engineer is responsible for creating a design set of conceptual drawings which reflect the project goals set forth by the end user. These conceptual drawings will then be interpreted by the Project Engineer to create the construction drawings. The Design Engineer is expected to have a much closer relationship with the end user, to ensure that the project goals are met, while considering any constraints (budget, timeline, aesthetics) identified by the end user.

Time and Money

Why then do we need to have design drawings at all? Why can’t the Project Engineer simply take the end user’s goals and design the system to construction level all by themselves without the need for a Design Engineer?

As with many things in business and life, the answer comes down to time and money. A Design Engineer is typically contracted directly to the end user or architect via a design contract. This happens very early in the development process, before contractors have been hired. The design team then has the time to meet with the client and stakeholders well before “boots are on the ground”. Budgets can be established, designs can be iterated and reiterated (and re-reiterated) with minimal impact on the overall project budget. Put simply, it is easy and relatively cost-free to make design changes on paper. Changes on-site are a different matter altogether.

Once construction contracts have been issued, boots are on the ground, and drywall is being hung, changes to the design of a system can have massive cost implications. Most integrators do not have engineers on staff that they can commit to being part of a multi-month or multi-year design process. Once they have been hired, they are on the clock to finish the project with (hopefully) a bit of profit in their pockets.

Relationships

An often-overlooked aspect of the importance of the division of the design and project engineering roles is that of impartiality and bias in relationships. While it can be expected that, as professionals, both Project and Design Engineers should value the relationship with the client equally highly as their bottom line, the same expectation might not always be true when it comes to product selection.

business relationshipsAV integrators, by their nature, must have relationships with the manufacturers of products that they sell and install. To ensure competitive pricing, on-time delivery, and pre- and post-sale support, integrators must cultivate and maintain these manufacturer relationships. Through no fault of their own, this means that integrators will tend to want to sell products provided by manufacturers with which they have good relationships.

While this is all well and good for the integrator, the needs of the project and end user may dictate equipment made by other manufacturers. This is where the value of independent Design Engineers and Consultants is made known. Rather than relying on the product offerings of a few select manufacturers, the independent Design Engineer can select the proper product for the application, regardless of the manufacturer.

Conclusion

While I wish I could go back and tell my younger self these important distinctions, the truth is that it took living and working in both the design and project engineering roles to truly appreciate the differences, as well as the necessity of both roles in the industry. Successful deployments of large-scale AV projects require both the design and project engineer specializations, and we should all be thankful for that!

Interested in more design or engineering related content? Check out “Revisiting ADA Mounting Requirements“.

John Rossman - headshot-frame

About the Author

John Rossman | CTS

BDM II – Technical Specialist

Supported Manufacturers: Harman ProfessionalAKG, AMX, BSS, Crown, DBX, JBL, Lexicon, Martin, & Soundcraft

Pin It on Pinterest